
 |
 |
 |
|
|
|
Step 1 |
|
|---|---|
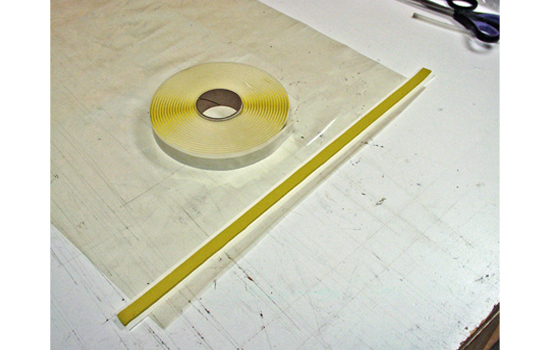 |
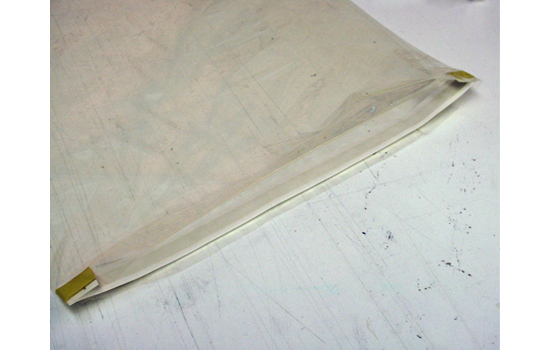
We will start by making up the vacuum bag. In the "Basic Vacuum Bagging System Set-Up Instructions" we covered using bag clips to make up a basic vacuum bag. That method works well but in this tutorial I will cover an alternate method, using bag seal tape. This method also works well and takes only slightly longer. Cut a length of vacuum bag tube about 12 inches longer than the length of the mold. Cut a length of Bag Sealant Tape that is 2 inches longer than the width of the bag tube. |
Step 2 |
|
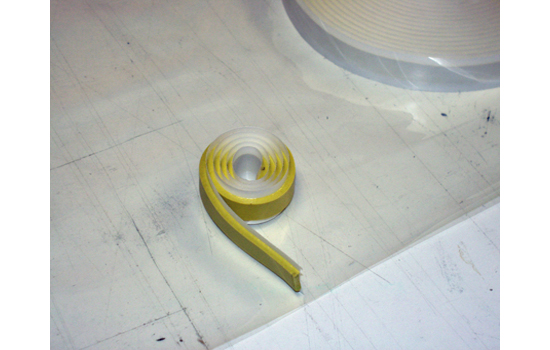 |
Roll the cut length of sealant tape up so the sticky side is out. This makes the tape much easier to control while you are placing it on the bag tube. |
Step 3 |
|
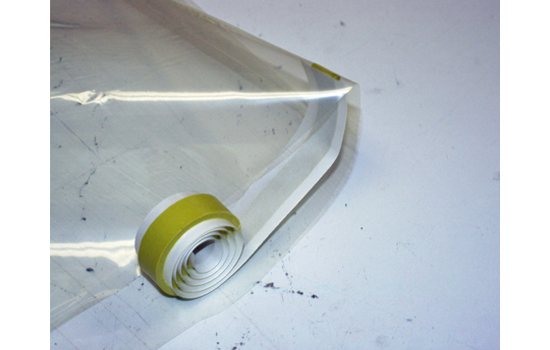 |
Place the tube flat on a table. Stick the end of the sealant tape to the inside of the tube. Start the end about 1 inch past the fold line on the edge of the tube. The tape should also be about ½ inch in from the end of the tube. The flat table will help prevent any wrinkles in the bag while you are sticking down the tape.
|
Step 4 |
|
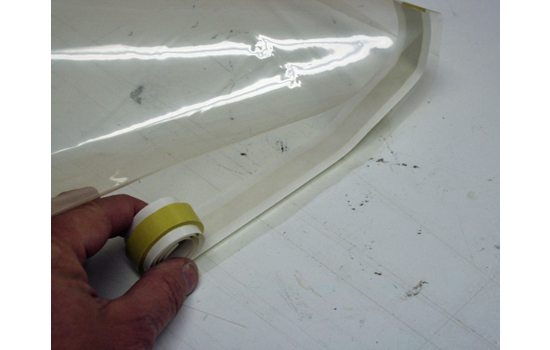 |
After the end is started, unroll the bag seal along the end of the tube. Keeping all wrinkles out of the bag, press the sealant into place as you go. |
Step 5 |
|
 |
Once the bag seal is in place it should extend about an inch past the fold line on the corner of the bag. Repeat the same steps to put the bag seal in the other end of the tube. Leave the paper backing on the sealant in place until you are ready to close the bag. |
Step 6 |
|
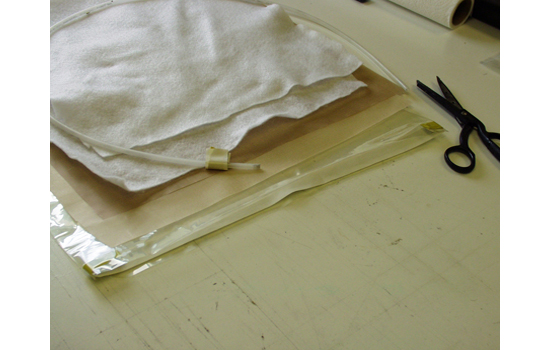 |
Cut two porous release film (peel ply) and two breather fabric layers a little smaller than the inside dimensions of the nylon vacuum bag. Also prepare the ¼” vacuum line that will run from the bag to the vacuum regulator. Wrap a short length of bag sealant around the vacuum line about two inches from end on the line. The vacuum line sealant is lined up with the bag sealant in the end of the bag when the bag is closed. The tube will extend inside the bag and breather must be wrapped around the end of the tube providing a continuous path for all the air to exit the bag. |
Step 7 |
|
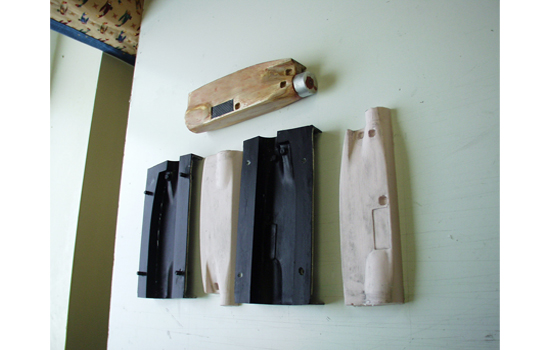 |
A two part fiberglass mold was made from a wooden pattern. Because this mold has many tight corners a pair of silicone rubber inserts were made to force the carbon fiber into all the corners of the mold. The inserts are slightly smaller than the mold to allow for the thickness of the carbon fiber layers. This was accomplished by applying a thin layer of sheet wax to the surface of the mold before the silicone inserts were made. For a larger part the silicone insert would only be made for the areas near the tight corners. |
Step 8 |
|
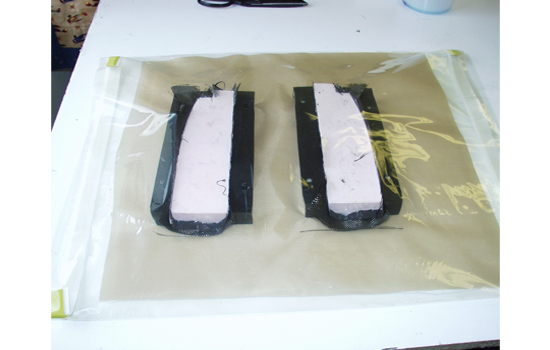 |
The carbon fabrics are wet out completely in the molds and the silicone rubber inserts are pressed into place over the wet lay up.
|
Step 9 |
|
|---|---|
 |
The bag is sealed by removing the paper backing from the sealant, and pulling the ends of the sealant strip so there are no wrinkles in the bag when it is pressed down against the sealant.
|
Step 10 |
|
|---|---|
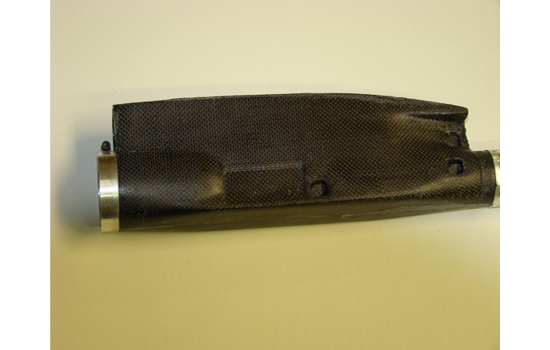 |
After the epoxy has cured the edges of the parts are trimmed and the halves are joined with a strip of carbon fabric. Instead of silicone rubber inserts, fiberglass inserts can be molded to serve the same purpose. Silicone rubber molding compound is difficult to find in small quantities and typically has a short shelf life. |