
 |
 |
 |
|
|
|
Making fiberglass parts if fairly straightforward once your mold is complete.Ā Your first part may not be perfect but the learning curve is quick.Ā By your third part, you should be able to routinely produce good quality parts from your new mold.
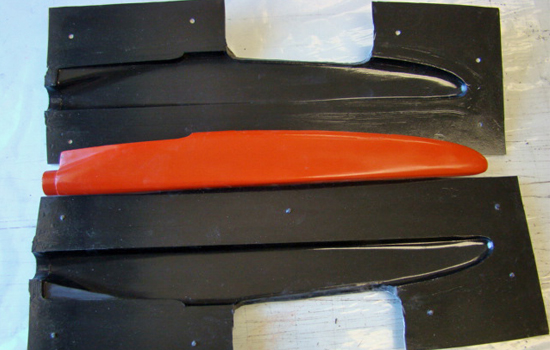 |
Apply Partall High Temperature Paste Wax to your new mold(s).Ā Wipe on a coat of wax and after a few minutes buff the dry wax off the surface with a clean rag. Apply mold release wax to the all surfaces including edges and even wax the back of the mold. Epoxy will run and it is much easier to clean up cured epoxy if the surface has been mold released. A new mold will require several coats of a mold release wax and at least two layer of a Coverall mold release.Ā The wax fills any microscopic porosity in the mold.ĀĀ The Coverall makes the release easier and gives the part a high gloss surface.Ā The Coverall can be applied with a good paint brush. Use the same application methods used to apply mold release in making the mold. Remember: You must use enough mold release if you donÆt you will probably loose your mold. |
|---|
Use the same WEST SYTEM epoxy that was used to build the mold to make your part.Ā Mix up a small batch of WEST SYSTEM 105 resin and 205 hardener for the gel coat layer and brush a thin even coat over the mold surface.Ā Let this layer of epoxy cure about 30 minutes. If you have small radii corners in the mold, mix a little 406 Colloidal Silica Filler into another batch of epoxy and fill these corners.Ā Glass cloth will not stay in tight corners as it pulls away air will get between the gel coat layer and the fiberglass leaving a void or bubble. Let this layer set up for at least 30 minutes.Ā It should be slightly tacky to the touch.
Step 3:
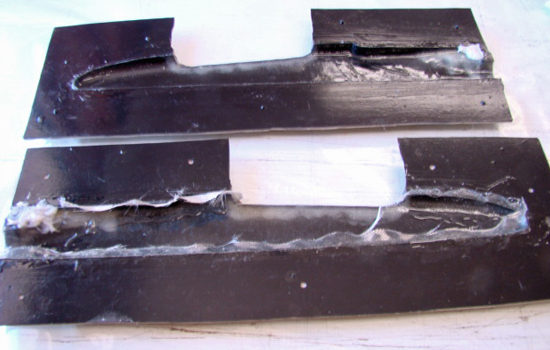
Now cut a piece of fiberglass cloth.Ā For this part I recommend CST style G3733 cloth.Ā The fiberglass cloth should be cut on the bias if there are tight corners, this will make fitting the glass into the corners easier.ĀWet the surface of the mold with a coat of epoxy and lay the dry fiberglass into the mold.Ā Start pushing the cloth into the epoxy at the deepest corner of the mold and work out from there.Ā Press all the cloth into the epoxy. Use a disposable epoxy brush and push the cloth down with the end of the brush in a dabbing motion.Ā Dry spots will appear white against the dark mold. Add more epoxy as needed to wet out the cloth completely and eliminate all air bubbles. Wet out the fiberglass cloth extending about ╝ö past all the edges of the mold.Ā On a part like this fuselage that will need to be strong you should apply a second layer of fiberglass as soon as the first layer is wet out completely.
Step 4:
 |
Let the epoxy cure at least 45 minutes this time.Ā When you trim off the excess glass, the epoxy must be cured to a solid yet flexible stage.Ā If you get gummy epoxy on the blade when you start trimming the edges, wait another 15 minutes and try again. Use the edge of the mold as a guide and trim off all the excess glass around the part.Ā If the blade is sharp and the epoxy is cured to the right stage, it will cut easily. Be careful to not cut into the mold release layer as you trim the glass. A small cut in the mold release is not a problem. |
|---|
 |
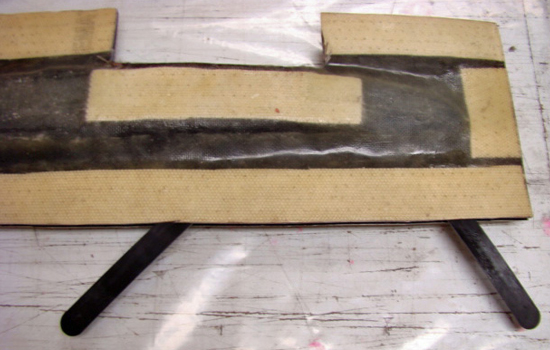
Now while the epoxy is not completely cured is the best time to join the parts.Ā Cut a bias strip of fiberglass cloth and apply it to the inside edge of one of the mold half's so the strip extends above the mold. Wet out the strip with epoxy and carefully put the mold half's together, insuring that the edge of the strip stays inside of the molded parts. In tight corners where it is difficult to work the glass strip into place you can mix up a epoxy 406 filler paste and apply it along the edge of the mold before closing the mold. The paste will fill the tight corner and bond the half's together. This method is used in the upper rear corner of the fuselage. Clamp the molded halves together then use a disposable brush along the seam line to smooth out the glass and epoxy.ĀĀ |
|---|
Step 6:
 |
Let the fuselage cure overnight before you remove it from the mold.Ā Start at one corner and separate the mold halves with a model knife.Ā As soon as the corner starts to open, use a the plastic mixing stick as a wedge to pry the mold halves apart working around the perimeter of the mold.Ā Carefully remove the part from the mold. |
|---|
Results:
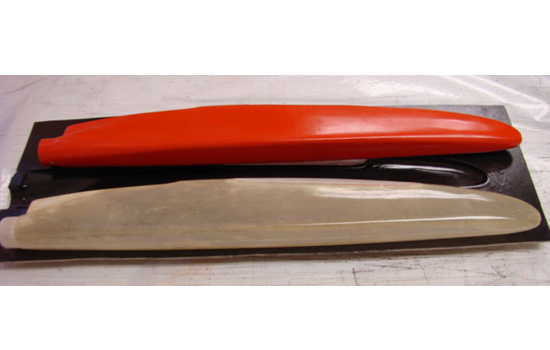 |
You now have an exact fiberglass duplicate of the original pattern! |
|---|
Materials used to make the Fuselage: