
 |
 |
 |
|
|
|
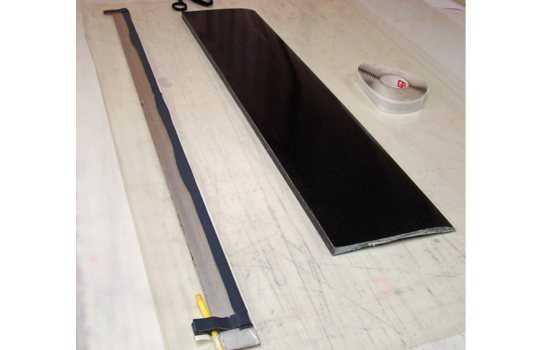
Molded Carbon Fiber Leading Edges
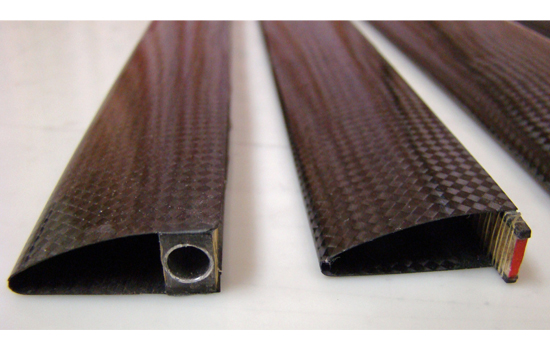 |
Molded carbon fiber leading edges are used on many models
airplanes because they give the wing great torsional stiffness and weigh very
little. These leading edges are also
called D-boxes. When glued to a wing spar the closed tube looks like the
letter D.
|
|---|---|
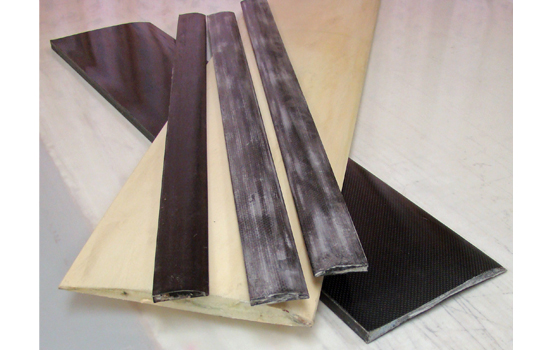 |
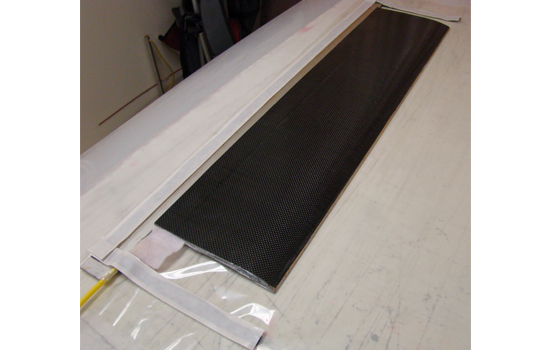
Simple tools are needed to mold these carbon fiber leading edges. The form is similar to a vacuum bagged wing except that the aft edge of the form must be at least ¼” thick. The airfoil can be cut off mid chord or the trailing edge of the airfoil can be thickened. The chord of the form should be at least ½” more than the intended chord of the molded leading edge. |
 |
The leading edge form must be waxed with several coats of
high temperature mold release wax. High temperature wax buffs out more easily and if the carbon epoxy lay
up is thick the wax will not fail due to temperature build up from a thick
layer of epoxy.
|
 |
Start by folding a couple of inches of bag sealant around the vacuum line two inches from the end. Tape the line to the forward edge of the metal bar at one end. Add a strip of bag sealant on the top and bottom of the metal bar along the aft edge. |
 |
On the bottom side of the metal bar add sealant to close the ends of the seal on both ends. The end seals extend beyond the metal bar and seal the vacuum line also. |
 |
Cut a sheet of vacuum bag film that will wrap around the
form and seal to the metal bar on both sides. Lay the film out and seal the bottom side of the bar down along one
edge. Add bag sealant on top of the bar
on both ends, the seals extend to close the bag up to the leading
edge of the form. Do not remove the
backing paper until you are ready to close the bag. Add some breather fabric around the end of the vacuum line.
|
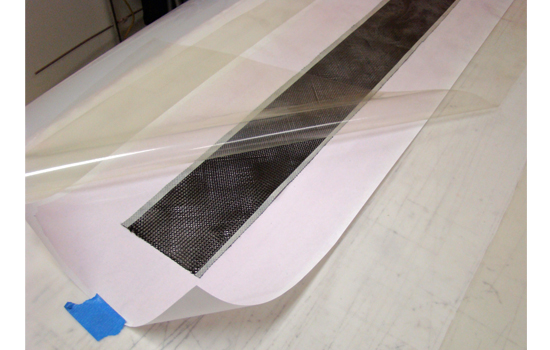 |
The molded shell is made from a bias cut carbon fabric. Lay out the fabric with narrow masking
tape along the edges, this stabilizes
the fabric to control distortion. The
distance between the tape lines should be ½” wider than the final dimension
around the molded leading edge.
|
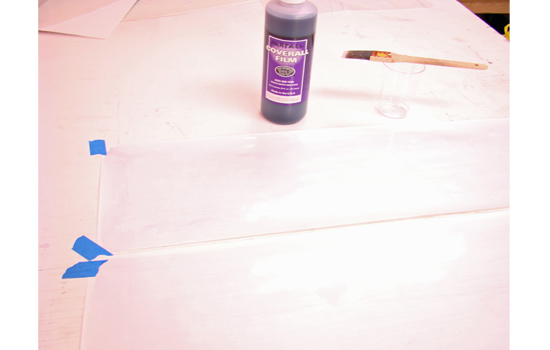 |
Paper peel ply is made by painting the plastic side of freezer paper with a coat of Coverall mold release. The mold release will need to dry for several hours before it can be used. Both peel ply layers must be at least 3” larger than the carbon fabric on all edges. |
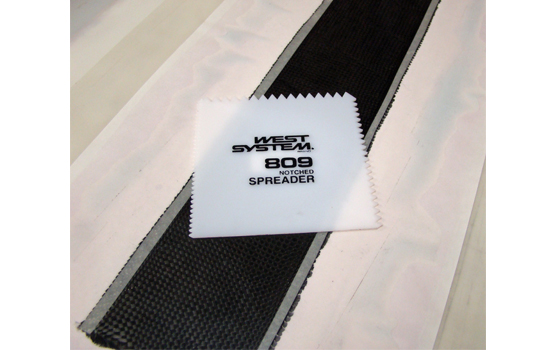 |
Stack up the three layers (paper peel ply,carbon fabric and nylon bagging film). Lift
the top bag film layer and pour a line of laminating epoxy down the middle of the
fabric. Pro-Set or MGS epoxy is
recommended for carbon fiber parts. I
also recommend that you use a West Systems Notched Spreader to spread the epoxy. Of course I use the edge with no
notches. This tool is made from hard
plastic so you can apply lots of pressure to remove all the excess epoxy from
the fabric.
|
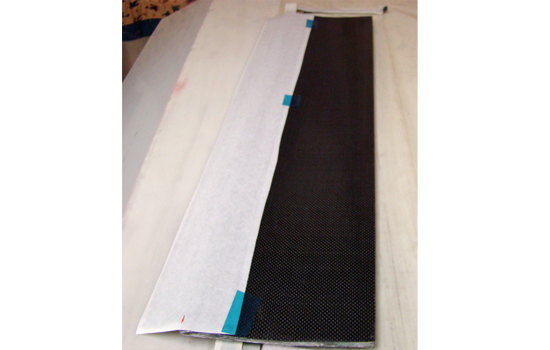 |
Cut the excess epoxy and peel ply away around the edges of the fabric. Leave ¼” of peel ply around the edges. Mark the center of the fabric on both ends. On the bottom of the form line up the marks with the leading edge and tape the paper peel ply in place so it will not slip when you pull the bag around the leading edge. |
 |
Put the form in the vacuum bag against the metal bar, pull the film tight around the leading edge and stick it to the upper side of the metal bar starting at the center of the form. Keep pulling the film tight and sticking it to the bar a few inches at a time out to one end then go from the center to the other end. |
 |
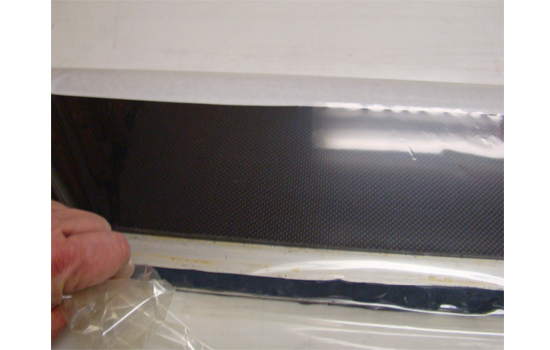
Seal up the ends of the bag and start the vacuum pump. There will be a few leaks in the bag but squeezing the seal at the leaks will seal the bag. |
|
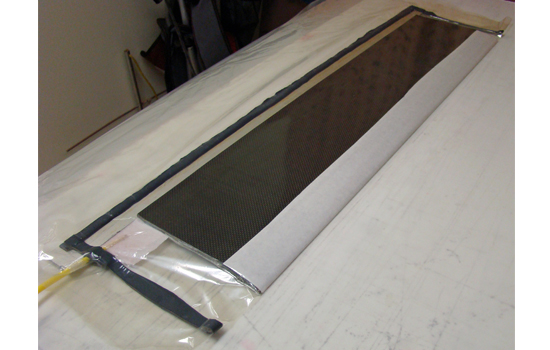
After the epoxy cures cut the bag open and pull the shell
off the form, trim the ¼” of excess peel ply around the fabric then peel the
layers off the molded shell. Remember
you will need to wash the Coverall film off of the carbon shell with
water.
|