 |
 |
 |
|
|
|
Vacuum bagging composite parts is a simple process that is used to compress composite layups while they cure. Here we will describe the basic assembly of our vacuum bagging system. One common use for vacuum bagging is foam core wing and tail surfaces for models. In this short description we will cover how to set up the bag and use the system to fabricate these components. A system includes a vacuum pump, all the materials in the vacuum bagging kit and a regulator assembly. The regulator allows you to monitor and adjust the vacuum pressure and provides a quick disconnect for the vacuum line at the source.
Currently there are two versions of the Vacuum Bagging Kit and two versions of Vacuum Pump offered as options.
| Step 1 |
|
|---|---|
Pro-Plus Kit Deluxe-Pro Kit |
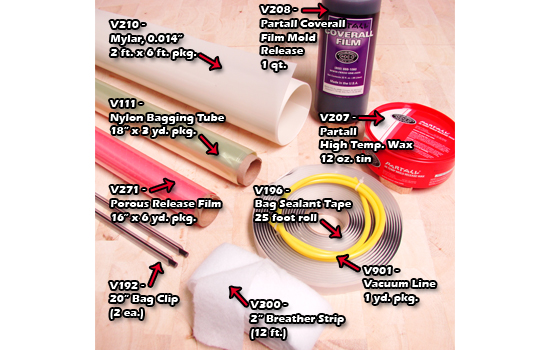
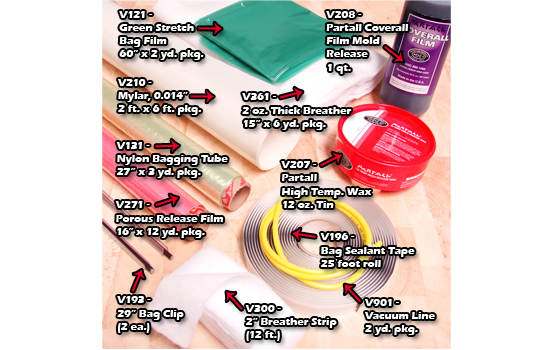
PRO-PLUS KIT 3 yd. of 18 in. wide Nylon Bagging Tube, V111 DELUXE-PRO KIT
For Vacuum Bagging Wings or Molding Composite Parts |
| Step 2 |
|
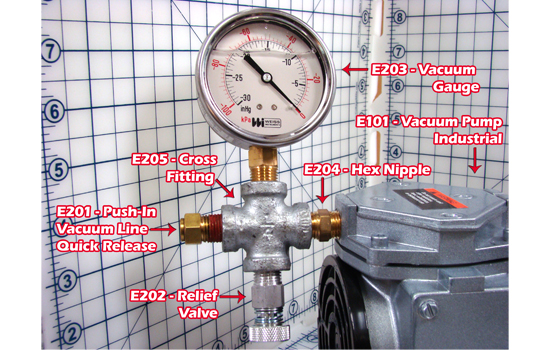 |
The Regulator Assembly is attached to the inlet of the vacuum pump and is composed of a Vacuum Gauge, a Relief Valve, a Vacuum Line Quick Release, a Cross Fitting and a Hex Nipple. The Relief Valve will bleed off excess vacuum allowing you to reduce the vacuum level. The Vacuum Line Quick Release will let you quickly connect and disconnect the vacuum bag from the pump. As you build the Regulator Assembly use teflon plumbers tape on all connections to assure an air tight system. |
| Step 3 |
|
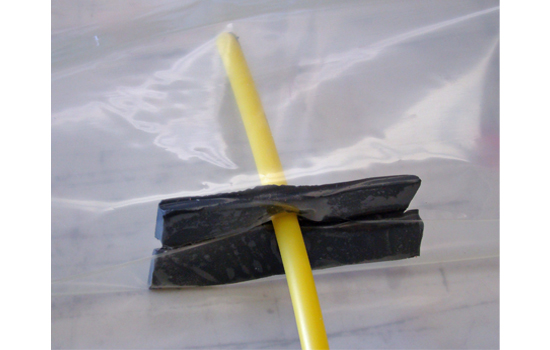 |
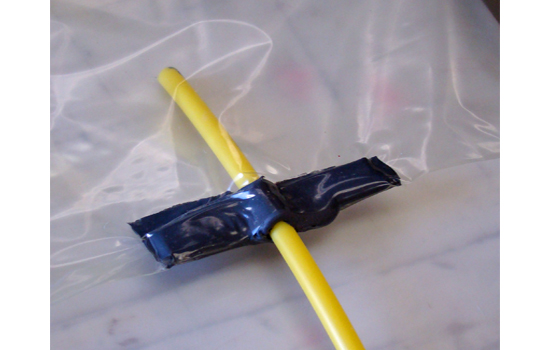
The vacuum bag can be reused many times. So cut the vacuum bag tube at least a foot longer than the longest part you plan to bag. You can easily shorten the bag by locating the bag clip to close the bag at the length you need. The vacuum line is inserted into the edge of the bag tube about 8 to 10 inches from one end. Cut a 1 inch slit along the edge of the flat tube. Then open the tube and apply a three inch strip of bag seal tape above and below that slit. Insert the end of the vacuum line through the hole about three inches. |
| Step 4 |
|
 |
Lay the bag tube flat and squeeze the two strips of bag seal together sealing the vacuum line in place and closing the bag tube opening. |
| Step 5 |
|
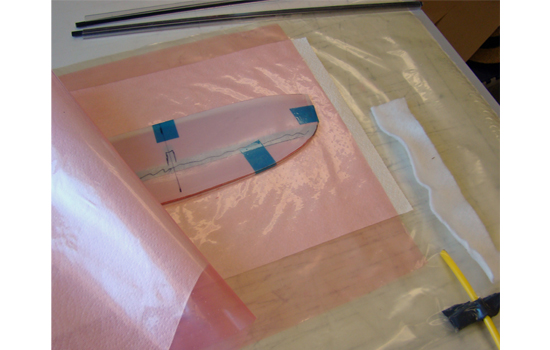 |
Now to the layers that are inside the vacuum bag. At the center is the part you will be bagging, in this case it is a stab. On the outside of the part are the .014 " mylar layers, which are taped together so nothing slides while you get all the layers in the bag. Details of the part lay up are covered in the tutorial " How to Vacuum Bag a Wing". The first layer outside the part is a perforated film peel ply. Air will pass through this layer but epoxy does not stick to the film. It is very thin and flexible. It easily conforms to the part. The next layer on each side is a breather layer. It assures the vacuum will be uniformly distributed over the entire surface of the part. For wings, stabilizers and other similar parts where very little epoxy is used, a very thin breather layer works well. A paper towel is used as the breather layer on this part. In addition, a strip of heavier breather material is needed to connect the end of the vacuum line with the breather layer over the part. |
| Step 6 |
|
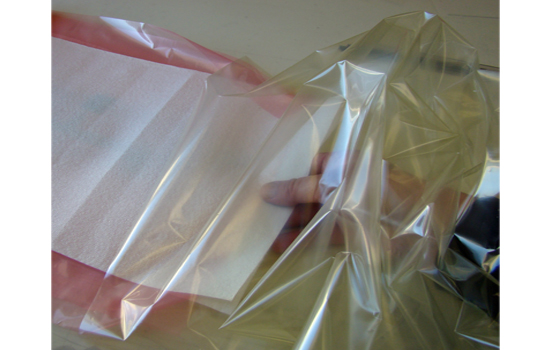 |
Getting all the layers into the vacuum bag can be a little difficult the first time. I find that the easiest way to slide all layers in the bag is to stack them up the table. Then put my arm through the bag tube and pull the layers into the bag while I flatten out the bag over the stack with the other hand. |
| Step 7 |
|
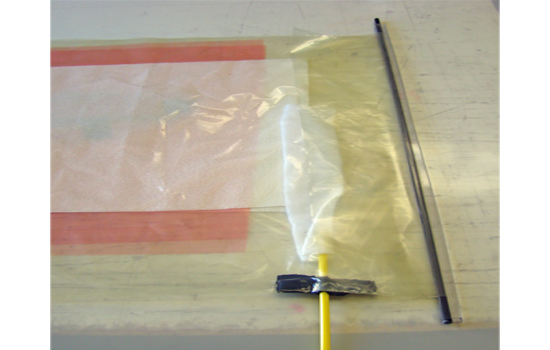 |
After all the layers are in position in the bag tube, add the breather strip from the vacuum line to the breather layers over the part. Make sure that the end of the breather strip folded over and covers the end of the vacuum line. Close both ends of the bag tube with clips. This is done by folding the bag tube over the black rod then pressing the clear channel over the outside of the rod. Make sure there are no wrinkles in the bag film under the channel. |
| Step 8 |
|
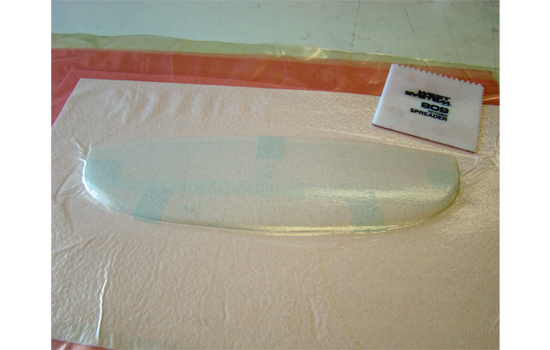 |
Insert the vacuum line into the Quick Release on the pump regulator. Then turn on the vacuum pump. The bag will pull down quickly over the part. Check the reading on the vacuum gauge. It should read between 18 and 24 inches of Hg depending on your altitude. I use a squeege over the outside of the bag to smooth out the bag surface and help the bag pull tight around the edges of the part. The squeege will also smooth out any edges in the layup under the mylar and move any excess epoxy off to the edges. Place the bag between the cut out blocks from the foam core and stack them on a flat table then add some weight on top of the stack to keep the part flat. The next day you can turn off the pump and remove your part from the vacuum bag. |