Introduction:
Fiberglass molds are
commonly used to make multiple copies of a part that may have a complex
shape. Some of the advantages of
using a fiberglass mold are: the materials are inexpensive, they are easy to
make, last many years and can be used to produce hundreds of parts. The process starts with a pattern that you
wish to copy. In this case I have
started with a wooden pattern of the front portion of a fuselage with an access hatch. This is a common part that a modeler may
want to build in fiberglass. At this
point the pattern has been sanded to a smooth surface and finished with a
primer.
Step 1
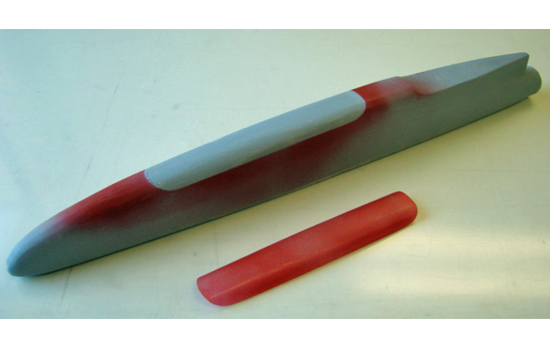
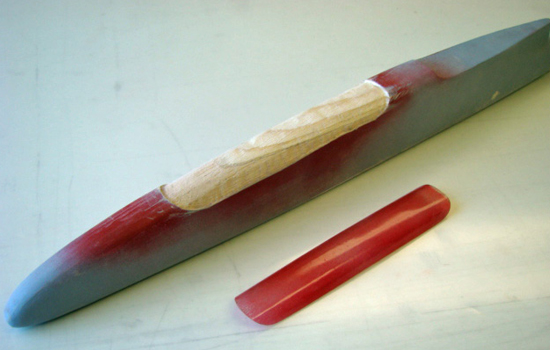
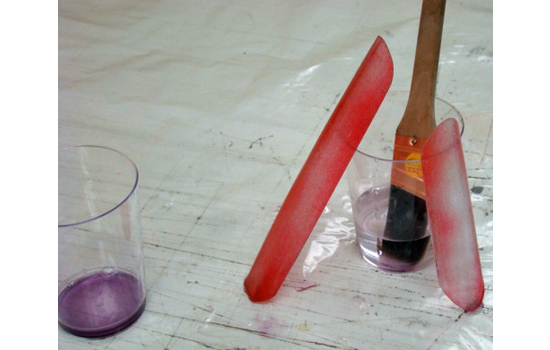
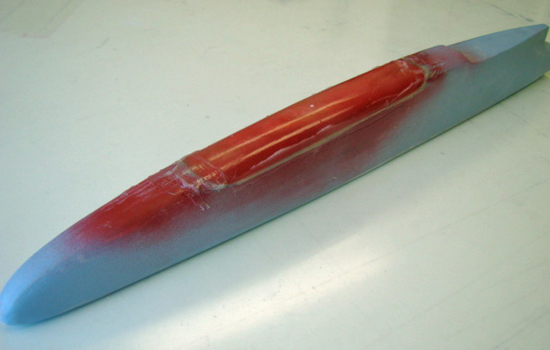
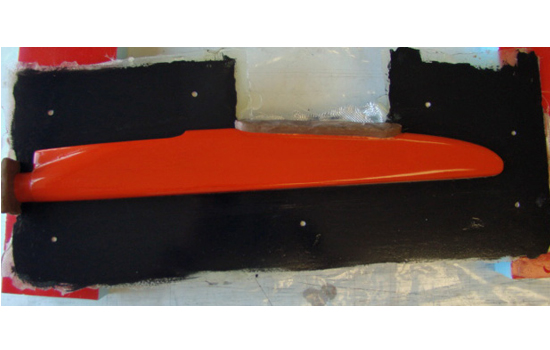
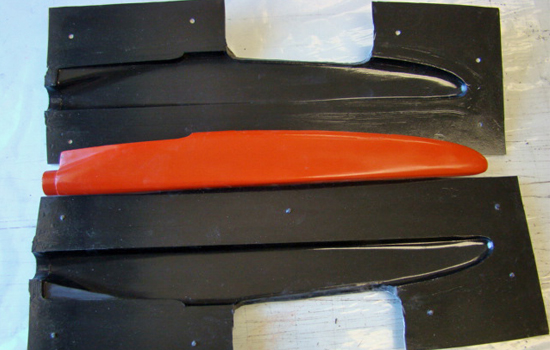
We will start by making a mold for the fuselage hatch, this way we will make a pattern for the hatch and use the hatch pattern to make the fuselage pattern fit the hatch perfectly. Applying mold
release to the pattern, it is
important to apply both Partall mold release wax and Coverall liquid mold
release. Waxing is repeated; a
number of times depends upon the surface. If the surface has any potential for porosity, multiple coats
are needed. These layers of wax will fill the tiny surface imperfections. If
you have any doubt, add more layers of wax. If they are not filled
completely, the epoxy will lock into these imperfections. Liquid Coverall mold release is then
applied over the wax.
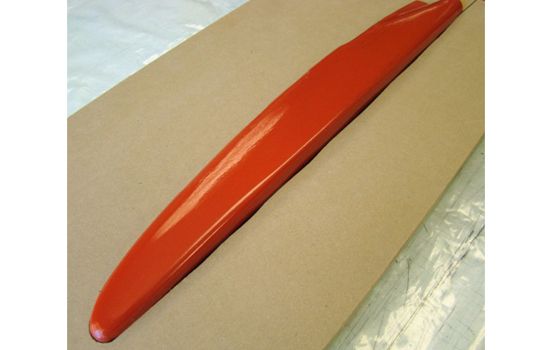
Coverall can
be applied with a good quality paint brush, water can be used to clean the paint brush after each coat. Apply a thin even coat being careful to eliminate any excess liquid or
runs. Let this coat dry
and apply a second coat to assure complete uniform coverage.
Dust and dirt can be trapped by the mold release as it dries and becomes a part of the mold surface. If you have any defects in your mold
release remove the layer with water and a paper towel and reapply the Coverall mold
release. The surface you see in the mold release will be the surface finish you will see in the mold and the parts. After you mold the part
the mold release must be removed from the mold and the part with water and a paper towel and reapplied before the next molding operation.
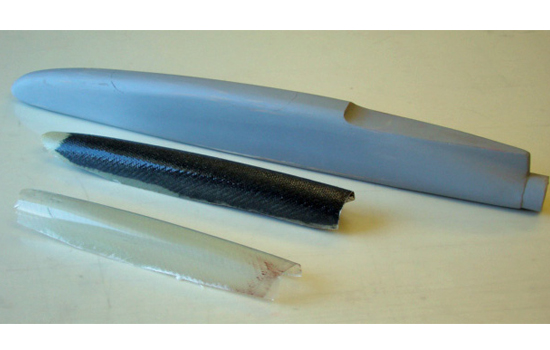
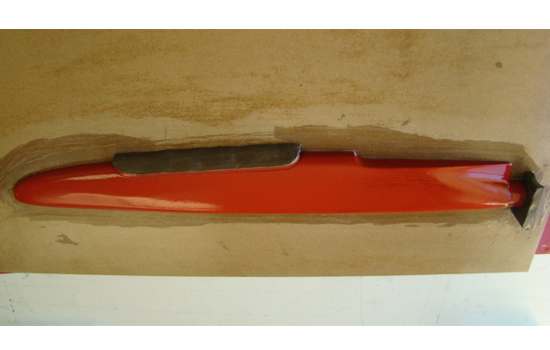
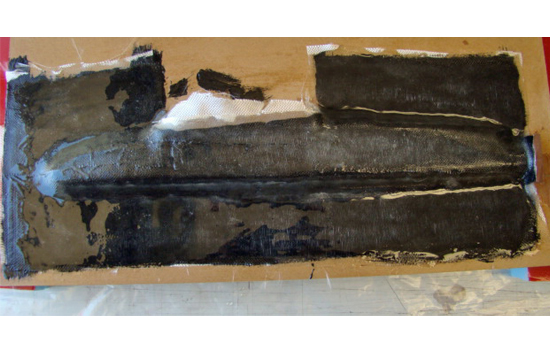
Now you are ready to
start applying the layers of epoxy and fiberglass cloth. Use the following West System Epoxy products:
105 Resin is a
low viscosity resin that easily wets out the cloth and allows for minimal air
bubbles between the cloth layers.
205 Fast Hardener allows sufficient time to wet out each layer then gels up quickly so the mold
building process can be completed in a few hours.
406 Colloidal Silica is used to thicken the epoxy system to aid in applying epoxy to vertical
surfaces, filling corners and details in the mold.
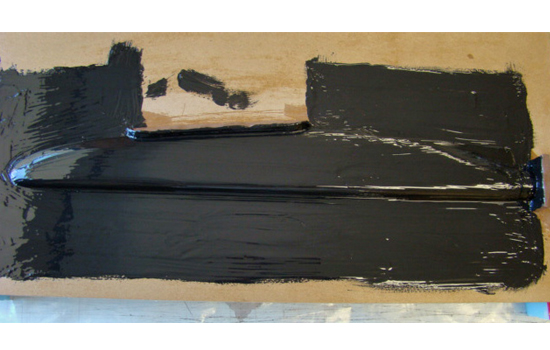
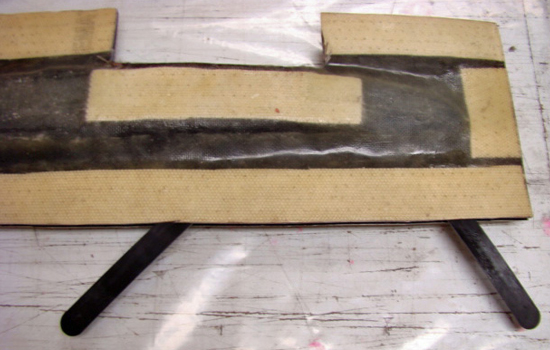
423 Graphite Powder is used to give the tooling coat layer of the mold a black color and a
harder, more durable surface.
Step 2
 |
To make the mold for the fuselage
hatch, apply a tooling coat layer of epoxy to the pattern in the area where the hatch
will be located . Tooling coat is made by mixing a batch of West
Systems 105/205 Epoxy add a teaspoon of graphite powder to the mixture
then stir in 406 filler to thicken the mixture to the
viscosity of ketchup. Make the mold a little
larger than the intended hatch size. Allow the tooling coat to cure to a soft solid; this should take about 30 minutes . Apply two layers of fiberglass cloth and
epoxy over the tooling coat layer. On
this small mold for the hatch, this lay up should be sufficiently
strong. |
Step 3
 |
After the hatch mold
has cured overnight, remove it from
the pattern, and clean off the Coverall with water and a paper towel. Mold release the hatch mold by the method in step 1 and apply a
thin coat of epoxy to the inside of the mold. After that cures to a solid, about 30 minutes, lay in a layer
of glass cloth and let it cure overnight. Pull the rough hatch from the mold and trim to the finished shape with a Dremel tool and sand paper. Use this hatch pattern to mark the hatch
location. Hold it in place and mark
the outline with spray paint. |
Step 4
 |
With a Dremel tool cut
away wood from the pattern. Cut away enough wood so the hatch will fit
flush with the fuselage surface. |
Step 5
 |
Apply mold release wax
and several coats of Coverall to the hatch pattern. |
Step 6
 |
Coat the recessed hatch
portion of the pattern with West Systems Epoxy and 406 filler mixture. Then press the hatch pattern in place
assuring the hatch is flush around the edges. Let the epoxy cure overnight and then sand away all the excess
epoxy to achieve a flush smooth edge. Now remove the hatch pattern from the fuselage pattern. You should now have good hatch edge formed into your fuselage pattern. |
Step 7
 |
The fuselage will be molded in two half’s then joined. If you have a complex fuselage shape you may need to divide it up into
more parts. In order to remove the
finished part from the mold, there must be a positive relief angle on all the
mold parts. This means that the mold
cross section must get wider as you go from the deepest part of the mold to
the outer edges. The parting surface
of the mold defines how the multiple parts of the mold will fit
together. The parting surface is made
from a sheet of ½” MDF with the profile of the fuselage cut from the center
of the sheet. |
Step 8
 |
The small opening around the edges of the
fuselage pattern must be sealed. This can be done by first mold releasing the pattern. Then
place the fuselage pattern into the parting surface with half the pattern
exposed. Fill the opening around the edge with a
mixture of West Systems Epoxy and 406 filler. After the epoxy has cured remove the pattern from the parting
surface and block sand the parting surface flat along the edges.
After you have the edge gaps filled build up the areas where openings in the mold are needed with clay. These openings give you access to the inside of the mold so you can join the half's of the molded part together. I have built up the areas of the hatch opening and tail boom connection opening. It is important to
apply both Partall mold release wax and Coverall liquid mold release
to the fuselage pattern and the parting surface as you did in step 1. |
Step 9
 |
The first layer of the mold is a black tooling coat. The color is
important when wetting out fiberglass cloth against the mold surface. Air bubbles and dry places in the fiberglass are white while the properly wet
out glass is transparent showing the black surface. The high contrast makes it easy to produce high quality
parts. Mix the mold gel coat using
West Systems 105 Resin and 205 Hardener. Add a teaspoon of Graphite
Powder. Then stir
406 filler, Colloidal Silica to get a mixture that has the viscosity of
ketchup. You need to be able to brush on a thin layer (0.01” to 0.02”) and
have a mixture that will stay on the vertical surfaces. Begin by brushing a thin layer in all the
corners. Be careful to NOT tray any
air in the corners as you apply this layer. This is a common problem particularly if you mix the tooling coat too
thick.
|
Now apply the tooling
coat over the remainder of the surface. Mix a little more Colloidal Silica into the mixed epoxy in the pot to
increase the viscosity. Apply some
additional tooling coat in the corners of the mold to fill in small radii
corners. It is difficult to wet out the fiberglass cloth and keep it in tight
corners of less than ¼” radius. By filling the corners now, you are making
the fiberglass cloth application easier.
Step 10
 |
While the tooling gel
coat is setting to a solid state, about 30 minutes, cut your fiberglass cloth. Use
a coarse weave fiberglass cloth to lay up the mold. CST style G3733 wets out easily and builds up thickness more
quickly than lighter materials. If
the mold has a complex shape cut the
fiberglass cloth on the bias so the fibers run on a diagonal. Strips 2 to 3
inches wide work well for complex shapes as the cloth will stretch and
distort as needed to follow the surface.
|
Step 11
When the tooling coat has set
to the point where the surface is only a little tacky, mix up another batch
of West System 105/205 epoxy (no fillers) and brush a liberal layer on top of
the tooling coat layer and begin laying fiberglass on the surface. Whenever possible, apply the epoxy first
then lay the dry cloth down. This
wets out the fiberglass from the bottom displacing the air in the fabric which
reduces the chance of trapping air under the wet fiberglass. Continue wetting the fabric
until you have at least two layers of fiberglass over the entire surface.
Step 12
Let the layers set up
for about 30 minutes just as you did with the tooling coat layer. The curing time between layers is not
critical. It must be long enough for
the epoxy to set and be only slightly tacky as a minimum and short enough
that the epoxy is not completely cured. At a 700 room temperature, anything between 30 minutes and
4 hours will work for the West Systems 105/205 mixture we are using.
Step 13
 |
Now we will increase the strength
of the mold by building up the thickness. An easy way to accomplish this is with a core material such as
Coremat, Aeromat or chopped strand mat as oppose to many layers of
fiberglass cloth. Cut the mat material into sizes and shapes to fit the
mold. Apply this layer with epoxy as
you did the fiberglass cloth and
apply another layer of fiberglass cloth over the top of the core material
creating a sandwich. As you can see, the core material is needed most around the edges of the mold and any large flat areas.
|
Step 14
 |
Set the mold aside and
let it cure overnight, the next day
remove the parting board. Use some plastic mixing sticks as wedges to separate the mold and parting surface. Clean up the Coverall mold release on the mold and fuselage pattern.
|
 |
With a Dremel tool and
a ¼ inch ball cutter, cut small recesses in the corners of the mold
flanges away from the pattern. These will key the second half of the mold into the first half. Now repeat steps 8 through 14 above to
build the second half against the first half of the finished mold. Mold releases, tooling coat,
fiberglass cloth, core material, fiberglass cloth and let it cure overnight. |
Step 15
 |
When completely cured. Use a Dremel toll with a reinforced
cut off wheel to trim away all the rough edges on the molds. Carefully separate the mold halves, you
may need to use a model knife into one corner working the blade between the
molds and gently twisting. When a
crack appears, slip a wedge (a mixing stick works great) into the space and
run it around the mold to separate the halves. |
 |
The mold is now complete and you are ready to start molding
fiberglass parts. |
Materials used to make the Mold:
- West System 105A Epoxy Resin
- West System 205A Epoxy Fast Hardener
- West Systems 300 Epoxy Metering Pumps
- West Systems 406 Colloial Silica Filler
- West Systems A423 Graphite Powder
- CST Style G3733 5.8 oz Fiberglass Cloth
- Chavant Y2 Clay
- Coremat Flexible Core
- Partall High Temperature Mold Release wax
- Coverall Film Liquid Mold Release
- Disposable Epoxy Brushes
- Disposable Gloves
- Reuseable Mixing Pots
- Reusable Mixing Sticks
|